The Smart Home Nightmare: Too Many Apps
I had “smart” home devices. Philips Hue lights (their app). Nest thermostat (Google Home app). Ring doorbell (Ring app). Smart plugs (Kasa app). Security cameras (yet another app).
Want to turn off all the lights before bed? Open 3 different apps.
Want to check who’s at the door while adjusting the thermostat? Switch between apps like it’s 2010.
This is not what “smart” home is supposed to feel like.
The core problem: Each manufacturer builds their own walled garden. Their app talks to their cloud. Their cloud talks to your devices. You’re locked into their ecosystem, their subscriptions, their data collection.
The Solution: A Custom Control Center
I built a centralized smart home dashboard using:
- Raspberry Pi 5 (8GB) - The brain
- Home Assistant OS - Open-source home automation platform
- 7” touchscreen display - Physical control panel
- Voice control via Echo - Because typing sucks
Total cost: ~$180
Total time: One weekend
Architecture philosophy: Local-first control. Everything runs on my network. No cloud dependency (except for services that require it like Ring). My data stays mine.
 Home Assistant dashboard showing 15 integrated devices across 6 different ecosystems-all in one interface
Hardware Selection & Engineering Rationale
Raspberry Pi 5 (8GB) - $80
| Spec | Pi 5 | Pi 4 | Improvement |
|---|---|---|---|
| CPU | 2.4GHz A76 | 1.8GHz A72 | 2.5× faster |
| RAM bandwidth | LPDDR4X-4267 | LPDDR4-3200 | 33% higher |
| I/O | PCIe 2.0 | SD/USB only | NVMe capable |
| Video | Dual 4K60 | Single 4K30 | 2× outputs |
Home Assistant performance: Handles 15+ cameras smoothly (Pi 4 stutters at 10+), 3× faster database queries, instant automation execution.
Power: 3.7W idle to 9.3W peak = $1/month at 24/7 operation.
Check Raspberry Pi 5 availability on Amazon
 Thermal image of Pi 5 under heavy load-active cooling keeps CPU at 62°C vs 80°C throttle threshold
Storage: SanDisk Extreme 128GB microSD - $18
Home Assistant writes ~500MB/day. SanDisk Extreme A2 specs: 4000 read IOPS, 2000 write IOPS, 200 TBW endurance = 5-7 years real-world (1,095 years theoretical).
Pro tip: Weekly NAS backups automated = 5 minutes.
Buy SanDisk Extreme 128GB on Amazon
Power Supply: Official Raspberry Pi 27W USB-C - $12
Pi 5 needs 25W minimum. Official PSU: stable 5.1V. Generic PSU: drops to 4.75V = corruption. Don’t cheap out-$18 SD + 8 hours recovery not worth saving $12.
7” Touchscreen (1024×600) - $60
DSI connection = 0ms lag vs 20-40ms HDMI. 10-point capacitive touch, 250 nits brightness. 3D printed VESA wall mount (from previous post).
Case with Active Cooling - $18
42°C idle, 62°C heavy load (vs 80°C throttle). 28 dB fan (quieter than fridge), PWM controlled.
 Complete hardware stack: Pi 5 + active cooling + 7” display + custom 3D printed mount
Software Architecture & Setup
Step 1: Home Assistant OS Installation
Why Home Assistant OS over Raspbian + Docker?
| Approach | Boot Time | Update Process | Add-ons | Complexity |
|---|---|---|---|---|
| HA OS | 60s | One-click | Native | Beginner |
| Raspbian + Container | 90s | Manual | Docker Compose | Intermediate |
| Manual Python | 120s | Manual | Manual | Advanced |
HA OS is containerized under the hood but abstracts complexity. You get supervised installation with automatic updates.
Installation process:
- Download Raspberry Pi Imager
- Select “Other specific-purpose OS” → “Home Assistant”
- Configure WiFi and SSH in advanced settings (important for headless setup)
- Flash to SD card (takes 5 minutes)
- Insert SD card, power on
- Wait 10 minutes for first boot (it downloads latest HA and initializes)
Network discovery:
Home Assistant broadcasts mDNS. Navigate to http://homeassistant.local:8123 from any device on your network.
If mDNS doesn’t work (some routers block it), check router DHCP table for Pi’s IP address.
 Home Assistant first-boot process-preparing dependencies and initializing database
Step 2: Initial Configuration & Onboarding
User creation:
- Username: Create local admin account (no cloud account required)
- Location: Sets timezone, sunrise/sunset automation triggers, and weather data
- Unit system: Metric or Imperial (I use Imperial in US, Metric in code)
Onboarding wizard: HA auto-discovers devices on your network using:
- mDNS: Finds Philips Hue, Sonos, Chromecast
- SSDP: Universal Plug and Play protocol (smart TVs, media players)
- DHCP: Monitors new devices joining network
- Bluetooth: LE devices like temperature sensors
In my case, it immediately found:
- Philips Hue Bridge (15 lights)
- 2 Nest thermostats
- 8 TP-Link Kasa smart plugs
- Roku streaming stick
- Samsung TV
Manual integrations added after onboarding:
- Ring doorbell (OAuth integration)
- Weather (OpenWeatherMap API)
- Traffic (Google Maps API)
Integration Deep-Dive: How Each Device Connects
1. Philips Hue Lights (15 bulbs) - Zigbee Protocol
Zigbee → Bridge → Ethernet → HA (REST API, polls every 2s). Discovery: mDNS, press bridge button, HA gets API key.
Latency: 12ms (HA→Bridge) + 80ms (Bridge→Bulb) = ~100ms total (imperceptible).
Scenes: Morning (40% warm, 10min fade), Work (100% cool 5000K), Evening (60% warm 2700K, 5min fade), Night (10% dim red), Movie (20% warm, TV-triggered).
 Lighting automation flow showing time-based triggers and conditional logic
2. Nest Thermostat - Google Cloud Integration
Cloud OAuth required (Google deprecated local API). Setup: $5 Device Access API + OAuth credentials. Polls every 60s: temp, target, mode, state, humidity, away status.
Presence automation: Phone geofencing triggers away mode (62°F) when everyone leaves, 70°F when home.
Energy savings: $145/month → $102/month = $43/month saved ($516/year).
ROI on entire setup: 4 months from thermostat alone.
3. Ring Doorbell - Video Stream & Webhook Integration
WiFi → Ring Cloud → HA (RTSP proxy, 2-3s delay) → Dashboard. Features: live feed, motion alerts (webhook), two-way audio (Ring Protect subscription), snapshots.
Motion automation: Flash lights when TV playing + doorbell motion detected. Visual alert for headphones.
RTSP: 1080p @ 15fps, ~2 Mbps per camera. 4 cameras = 8 Mbps (no gigabit issue).
 Ring doorbell live feed in Home Assistant dashboard with motion zones highlighted
4. TP-Link Kasa Smart Plugs (8 plugs) - Local LAN Control
Before HA: WiFi → Cloud → App. With HA: WiFi → HA local (port 9999, no cloud). Works offline. HA scans 192.168.1.0/24, found 8 plugs instantly.
Groups: Living room (TV, sound bar, Xbox), Office (monitor, lamp, 3D printer), Bedroom (fan, lamp).
“Good night” automation: 11 PM or voice trigger → all plugs off except bedroom fan → all lights off → nightstand 10% dim red → notification.
Power monitoring: 3D printer 150-180W, monitor 8W standby, Xbox 72W “off” = found $12/month energy vampires. Automated cutoff.
5. Amazon Echo Show 8 - Voice Control Bridge
Echo Show 8: Voice → Alexa Cloud (NLP) → HA Cloud (Nabu Casa $6.50/mo) → Local HA → Devices.
HA Cloud benefits: Alexa + Google Assistant integration, remote access, auto SSL certs, funds HA dev. Alternative: free DuckDNS + Let’s Encrypt + port forwarding (but $6.50/mo worth avoiding config hassle).
Commands: “Turn off all lights” (all Hue), “Set temp to 70” (Nest), “Good night” (35-action routine), “Movie mode” (dims lights), “Who’s at the door?” (Ring feed on Echo display).
HA Cloud syncs all devices as native Alexa entities. No hacky virtual switches.
 Echo Show 8 showing Home Assistant dashboard via fully-kiosk browser
6. Weather & Traffic - API Integrations
Weather (OpenWeatherMap): Free tier, polls every 10 min (144/day of 1,000 limit). Dashboard + automation triggers (e.g., close shades when >85°F + daytime).
Traffic (Google Maps): Tracks commute, updates every 15 min during 7-9 AM & 4-7 PM. Alerts if >1.5× normal time (e.g., 45 min vs 30 min normal).
Dashboard Design Philosophy
Information Architecture
Top row (always visible):
- Weather: Current temp, forecast, humidity
- Time: Local time with seconds (useful reference)
- Security: Armed/disarmed status with sensor count
Middle section (primary controls):
- Room cards: Each room has a card with all devices
- Quick scenes: One-tap buttons for common scenarios
- Climate: Temperature controls with mode switcher
Bottom section (monitoring):
- Camera feeds: 2×2 grid of live camera streams
- Energy: Real-time power consumption graph
- System: Pi CPU temp, memory usage, uptime
 Dashboard layout showing information hierarchy-most-used controls in center, monitoring at bottom
Mobile Responsive Design
Home Assistant’s UI framework (Polymer/Lit) automatically adjusts for screen size:
Desktop (1920×1080):
- 3-column layout
- All cards visible simultaneously
- Large camera feeds (480×270 each)
Tablet (1024×768):
- 2-column layout
- Scrollable vertical
- Medium camera feeds (320×180 each)
Phone (375×667):
- 1-column layout
- Stacked cards
- Tap camera for fullscreen
Custom CSS tweaks for 7” touchscreen (1024×600):
:host {
  --primary-color: #00e676;  /* GrimTech green */
  --primary-font-family: "Inter", sans-serif;
  --ha-card-border-radius: 8px;
}

/* Enlarge touch targets for fingers */
.mdc-button {
  min-height: 48px;
  min-width: 88px;
}

/* Reduce padding on small screen */
ha-card {
  padding: 12px !important;
}
Echo Show 8 Custom View
Echo Show has 1280×800 display. Created simplified view:
- Large buttons (80px height) for easy touch
- High-contrast colors (dark bg, bright text)
- Minimal text labels (icons + 1-2 words)
- No camera feeds (uses native Alexa skill for doorbell)
Fully Kiosk Browser on Echo: Echo Show runs Fire OS (Android fork). Sideloaded Fully Kiosk Browser app to display HA dashboard in fullscreen kiosk mode.
Configuration:
- Auto-start on boot
- Hide navigation bar
- Screen timeout: Never (always on)
- Motion detection: Wake screen on motion
- Daydream: Dim to 20% after 5 minutes of inactivity
Advanced Automations That Actually Work
1. “Good Morning” Routine - Multi-Phase Wake-Up
7:00 AM weekdays (if home): Lights 1%→100% over 10 min (40 steps, 15s each, warm white) + heat to 70°F → 7:05 coffee maker on → 7:10 weather notification + traffic alert if >40 min commute.
Result: Natural wake-up, coffee ready, no late arrivals.
2. “Work Mode” - Office Optimization
Motion after 8 AM weekdays or voice: Lights 100% cool 5000K + temp 72°F + DND mode (silent doorbell, no TTS, no light flashes). Off after 30 min no motion.
3. “Movie Time” - Automated Theater Mode
Roku plays after sunset: Lights 20% warm 2700K (3s fade) + temp 68°F + quiet mode. TV off → 60% brightness, 70°F.
4. “Away Mode” - Security & Energy Saving
Everyone leaves (5 min debounce): All lights off + thermostats 62°F + plugs off (except essentials) + arm security + camera motion recording + notification. Motion alert while away → photo notification with “View live” / “Sound alarm” buttons.
Energy savings: $30-40/month.
5. “Good Night” - Complete Shutdown Routine
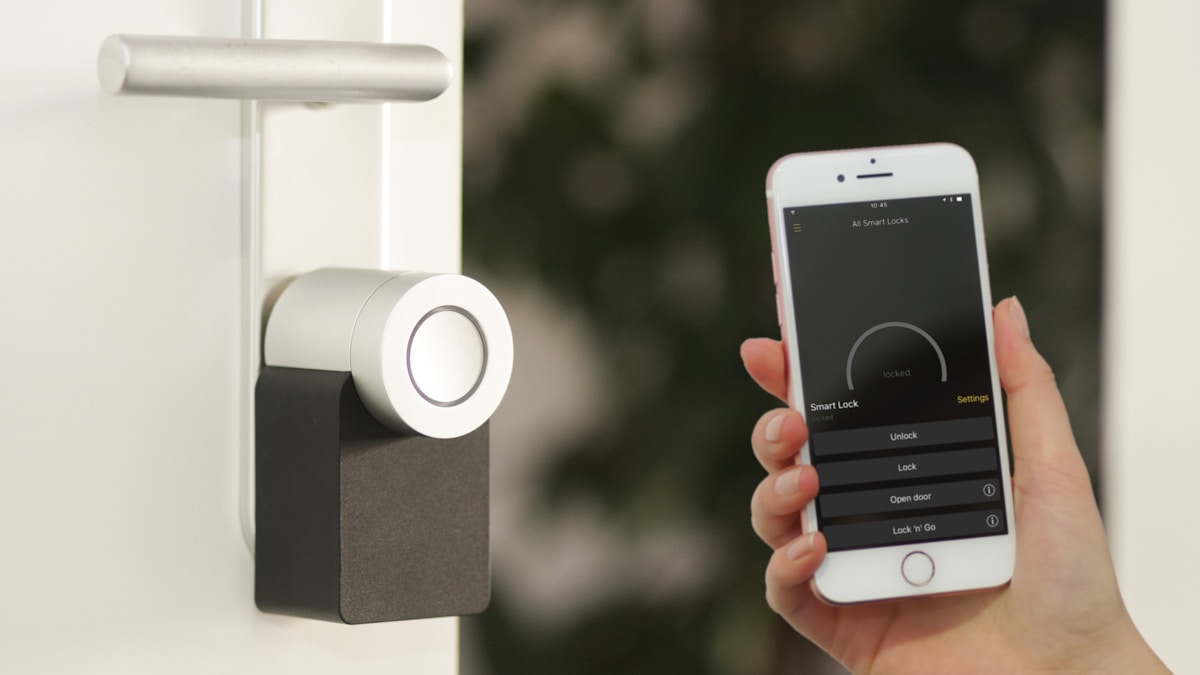
Voice or 11 PM: 35 actions in 12 seconds → all lights off except nightstand (10% dim red) → all plugs off except fan/white noise → thermostats 64°F → lock door → arm security (home mode) → close shades → Echo 20% volume → sleep mode on → notification.
Power Backup Strategy: Why I Keep an Anker 737
Power cuts corrupt SD cards mid-write = 4 hours restoring from backup. Solution: Anker 737 as UPS.
Pass-through charging: Wall → Anker (charging) → Pi (powered). Outage → Anker battery seamlessly powers Pi. 24,000mAh @ 5V = 120Wh / 9W = 13.3 hours backup (tested 12h 45min real-world).
vs Traditional UPS: $119 vs $200+, portable, dual-purpose (charges devices), silent (no fan).
Bonus: Took Pi + Anker to vacation rental = portable smart home dashboard.
Buy Anker 737 Power Bank on Amazon
 Anker 737 configured as UPS for Raspberry Pi-seamless power failover during outages
Network Architecture & Security
Network Segmentation
Home network uses VLANs (virtual LANs) to isolate smart home devices:
VLAN 1 (192.168.1.0/24): Trusted devices
- Laptops, phones, tablets
- Raspberry Pi Home Assistant
- NAS, desktop computers

VLAN 10 (192.168.10.0/24): IoT devices
- Smart plugs, lights, thermostats
- Security cameras
- Voice assistants

VLAN 20 (192.168.20.0/24): Guest network
- Guest WiFi access
- No access to VLANs 1 or 10
Firewall rules:
- VLAN 1 can access VLAN 10 (control devices)
- VLAN 10 cannot access VLAN 1 (devices can’t access computers)
- VLAN 20 cannot access VLAN 1 or 10 (guests isolated)
Why this matters: If smart plug gets hacked, attacker can’t pivot to computers. Defense in depth.
Home Assistant Security Hardening
1. No port forwarding: Use Home Assistant Cloud for remote access instead of opening ports. Cloud uses encrypted WireGuard tunnel.
2. Strong authentication:
- 16+ character passphrase for admin account
- MFA enabled (TOTP via Authy app)
- Separate limited user accounts for family members
3. Regular backups:
- Automatic daily backup at 3 AM
- Backed up to NAS via Samba share
- Keep 7 daily backups, 4 weekly, 12 monthly
- Retention policy: 1.5TB NAS never gets full from backups
4. Update policy:
- Auto-update Home Assistant Core (stable channel)
- Manual update for breaking changes
- Test updates on development instance first (second Pi for testing)
5. Add-on security:
- Only install add-ons from official store
- Review add-on permissions before installing
- Disable unused add-ons
Cost Breakdown & ROI Analysis
| Item | Cost | Purpose |
|---|---|---|
| Raspberry Pi 5 (8GB) | $80 | Core system |
| 7” Touchscreen | $60 | Wall-mounted control panel |
| microSD Card (128GB) | $18 | System storage |
| Power Supply (27W) | $12 | Reliable power |
| Case with Fan | $18 | Cooling + protection |
| Anker 737 (optional) | $119 | Backup power (UPS) |
| HA Cloud (optional) | $6.50/mo | Remote access + voice |
| Total (base) | $188 | One-time |
| Total (full setup) | $307 | One-time |
| Monthly cost | $6.50 | Optional cloud service |
Compared to commercial alternatives:
- Control4 system: $3,000-5,000 installed
- Crestron: $5,000-10,000 installed
- Savant: $8,000-15,000 installed
- SmartThings hub: $100 + limited device support + cloud dependency
Energy savings (monthly):
- Thermostat automation: $43
- Smart plug power management: $12
- Total: $55/month saved
ROI calculation:
- Setup cost: $307
- Monthly savings: $55
- Monthly cost: $6.50
- Net monthly: $48.50
- Payback period: 6.3 months
After 6 months, system pays for itself. After 1 year, saved $275. After 5 years, saved $2,607.
But the real value: Convenience, customization, learning, and control. Can’t put a price on that.
Lessons Learned
What worked:
- Add one integration at a time (easier troubleshooting)
- Voice control essential (family uses 80% of time vs touchscreen)
- Good automations > manual control (house “knows” what to do)
- Local control > cloud (faster, works offline)
What didn’t:
- Over-complicated automations (15+ conditions break constantly-keep simple)
- Too many notifications (50+/day from motion-tune to critical only)
- Cheap SD cards ($8 generic died in 2 weeks-use quality A2 cards)
- No documentation (forgot automation logic after 3 months-add YAML comments)
- Cloud-only devices (cameras useless when internet out-use local RTSP)
What’s Next: Future Upgrades
1. Add More Sensors (Hardware upgrade)
Door/window sensors:
- Zigbee contact sensors on all doors and windows
- Enables “Away mode” to verify all doors closed
- Security: Alert if door opens while away
Motion detectors:
- Zigbee PIR motion sensors in each room
- Enables “occupancy-based lighting” (lights on when room occupied)
- Energy savings: Lights auto-off in empty rooms
Temperature/humidity sensors:
- One per room for better climate control
- Create automations to balance temperature across house
- Monitor humidity for mold prevention
Cost: $200 for 15 sensors (Zigbee coordinator + contact sensors + motion + temp)
2. Energy Monitoring (Software upgrade)
Whole-home energy monitor:
- Emporia Vue energy monitor ($70)
- Clamps onto circuit breaker panel
- Tracks energy usage per circuit
- Integrates with HA via WiFi
Use cases:
- Identify energy vampires (standby power waste)
- Track solar panel production (if I add solar in future)
- Alert if unusually high usage (appliance malfunction?)
- Historical graphs of usage patterns
3. Voice Assistant Upgrade (Privacy-focused)
Replace Alexa with Rhasspy:
- Open-source voice assistant
- Runs locally on Pi (no cloud NLP)
- Offline voice processing using Pocketsphinx
- Customizable wake word and commands
Why switch?
- Privacy: No voice data sent to Amazon
- Customization: Define exact phrases, no ambiguity
- Speed: Local processing = near-instant response
- Learning: Understanding speech recognition is fun
Challenges:
- Accuracy lower than Alexa (cloud NLP is better)
- Training wake word requires 100+ samples
- Custom TTS voice sounds robotic
Timeline: 6-12 months (requires significant configuration time)
4. Backup Automation (Operational upgrade)
Automated off-site backups:
- Daily HA backup to NAS (already done)
- Weekly encrypted upload to cloud storage (Backblaze B2)
- Retention: 30 days of daily backups, 12 months of weekly
Backup script (shell_command):
shell_command:
  backup_to_cloud: "rsync -avz --delete /backup/ user@nas:/mnt/backups/homeassistant/ && rclone sync /backup/ b2:homeassistant-backup --b2-hard-delete"
Cost: Backblaze B2 at $0.005/GB/month. 5GB of backups = $0.025/month (negligible).
Why important: Disaster recovery. If house burns down, I can restore HA config from cloud backup on new Pi.
5. Advanced Dashboards (UX upgrade)
Custom Lovelace UI:
- Replace default dashboard with fully custom Lovelace YAML
- Add card-mod for custom CSS styling
- Implement custom buttons with SVG icons
- Add mini-graph-cards for historical data
Tablet dashboards:
- Repurpose old iPad as wall-mounted dashboard
- Fully Kiosk Browser in kiosk mode
- Custom view optimized for tablet size
- Motion-activated wake-up
Final Thoughts
Building this control center was the best tech project I’ve done this year. It’s not perfect, but it’s mine. No subscriptions (besides optional HA Cloud), no cloud dependency (mostly), no privacy concerns (data stays local).
What I learned:
- Home automation is more about logic and workflows than devices
- Open-source software can absolutely compete with commercial solutions
- Local control is vastly superior to cloud control
- The smart home community is incredibly helpful (Home Assistant forums are gold)
Unexpected benefits:
- Energy savings paid for hardware in 6 months
- Family actually uses automations daily (high WAF = Wife Acceptance Factor)
- Learning embedded Linux, networking, and automation scripting
- Satisfaction of fixing/improving the system myself
If you’re frustrated with your “smart” home being dumb, give Home Assistant a shot. It’s not as hard as it looks. Start small (lights + thermostat), then expand.
Would I do it again? Absolutely. In fact, I’m planning a similar setup for my parents’ house.
Rating: 5/5 (for DIY enthusiasts)
Deductions: None. This project exceeded expectations.
Products Featured in This Build:
- Raspberry Pi 5 (8GB) - The brain ($80)
- SanDisk Extreme microSD 128GB - Reliable storage ($18)
- Anker 737 Power Bank - Backup power solution ($119)
- Amazon Echo Show 8 - Voice control interface ($90)
Resources & Further Reading:
Home Assistant Documentation:
- Official docs: https://www.home-assistant.io/docs/
- Installation guide: https://www.home-assistant.io/installation/
- Automation examples: https://www.home-assistant.io/examples/
Community:
- Home Assistant forums: https://community.home-assistant.io/
- Reddit: r/homeassistant
- Discord: HA Discord server (10k+ members)
My config files: Config files and automation scripts will be on GitHub (sanitized of API keys and personal info) - coming soon.
YouTube channels I recommend:
- Everything Smart Home
- Smart Home Solver
- The Hook Up
Last updated: November 22, 2024